Baked ham! It’s not just for Easter.

Recipe, Recommended


ham
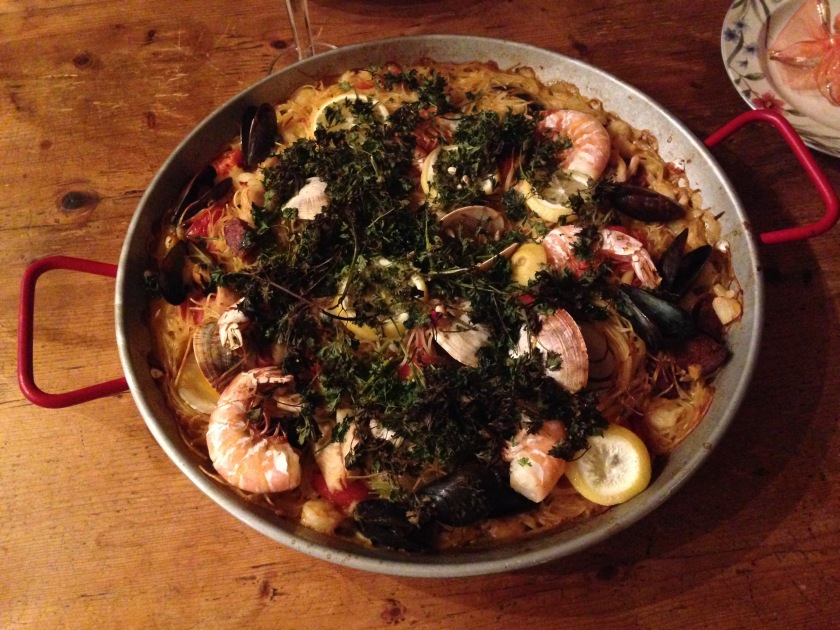
As you may have guessed, I have a great affinity for pork products. While on the surface, it may be the decidedly unglamorous staple of a lunchtime sandwich, the lowly ham can occasionally have center stage at Easter, Christmas, or other large gathering. Usually, it’s one of those 10-pound behemoths purchased from a specialty store or super market that come already glazed and ready to go. Yes, they are delicious and convenient, but you can make a cheaper and much more sophisticated version at home, with about the same amount of skill that it takes to go to the store, buy the ham, and pour whatever glaze concoction it comes with.

Another bit of news…You can also buy a mini ham at most grocery stores! Well, why is this exciting, you ask? Well, as it turns out, it is a super easy and fancy looking weeknight dinner with the same minimal effort! It’s especially nice when cooking for two, as you will have leftovers that you can transform into any number of other dishes in the days to come.
I like to re-use in croquetas or gratin aux courgettes.

I usually serve with some mashed potatoes and green peas, but I came across these lemon potatoes from Martha Stewart that paired really nicely as well.

lemon potato

Here is my go-to glaze recipe for a baked ham for two:

quarter ham
1/4 cup whole cloves
1 tsp grated orange peel
1/4cup brown sugar
1 heaping tablespoon grain mustard
1 tsp cider vinegar

Preheat oven to 350 degrees.

Score the top of the ham and stud all over with the whole cloves. Place on a roasting pan or baking dish and into the oven for 30 minutes.

In a small bowl, whisk the orange peel, brown sugar, mustard and vinegar together until combined.

When the 30 minutes are up, pour the glaze over the ham and return to the oven for 15 minutes.

Remove the ham from the oven and let it rest for about 10 minutes before slicing and serving.

Notes:

You can switch out the cider vinegar for orange juice.
If the ham is pre-sliced, you don’t need to score it, but I recommend that you tie it together with some butcher’s twine so that it stays together in the oven.
If you are using a whole (8+pound) ham, increase the ingredients accordingly.


Deliciously cheap and lazy…

Recipe

Screen Shot 2016-08-10 at 10.59.08 AM

So a few weeks ago, amid a 5-hour Stranger Things binge, my husband started asking about dinner. It was raining and neither one of us really had the motivation to go to the store. I poked around the kitchen and found I had some canned tomatoes and spaghetti, so I went about finding a good sauce with few ingredients. And I found GOLD!

Gold being Marcella Hazan’s tomato and butter sauce. It sounds strange. All you need is butter, tomatoes, onions, and salt. Chop up the tomatoes and onions, throw in the salt and butter, and walk away. It’s delicious as is, but in the few times I have made it since, I’ve thrown in some basil and red pepper flakes as well.

It’s a great recipe for when you’re on a budget and/or just not really in the mood to create anything elaborate. Not to mention, the ingredients are things you normally might have laying around your kitchen.

Happy eating!

That’s a Fancy Looking Chicken…

Musings, Recipe

couscouschicken

I have to admit I am late to the party on frozen chicken. Weird. I know. My husband recently introduced me to these giant bags of frozen boneless breasts and I have to say, they are really a lifesaver! They’re cheap and provide a large quantity of individual breasts and they can stay in your freezer pretty much forever. I’ve also learned that you can get thighs, drumsticks, and other bone in cuts too!

Okay, that’s enough of my frozen chicken epiphany. Because they are so convenient, these bags have now made chicken breasts a staple of my weekly dinner menu. After having fried them, steamed them, wrapped them in bacon, made stir fry and lettuce wraps, I was running out of ideas. I was also too lazy to go to the store one day, so I came up with the following super easy, super versatile, and dare I say, pretty fancy looking recipe.

So I had the chicken breasts, red onions, and Israeli couscous. I also had (and still have) more zucchini than I know what to do with, so those are the basic ingredients I used for this version. You can substitute with chicken thighs, sweet onions, butternut squash, pumpkin, mushrooms, or even asparagus, broccoli or cauliflower. Really, whatever you have on hand should work!

4 boneless, skinless chicken breasts, diced into 1-inch chunks
1 red onion, coarsely chopped
1 large zucchini, diced into 1-inch pieces
3 cloves garlic, minced
1 tablespoon tomato paste
1/2 sachet Lipton Onion Soup
1 tsp Italian Seasoning
Juice of 2 limes or lemons
2 tbsp olive oil
1/2 cup white wine
Salt and Black Pepper to taste

1 cup cooked Israeli couscous, prepared according to package directions.

Preheat oven to 400 degrees.
Combine all ingredients except the couscous in a 9×13 glass baking pan. Make sure chicken and vegetables are well coated with seasonings and olive oil.
Bake for 45 minutes to 1 hour.

Remove from oven and combine with the cooked couscous in a large bowl. Check for seasoning and adjust if necessary and serve.

Serves 4.


Tacos are not Cuban food.

Recipe

cuban taco

But that’s okay!

You can make Cuban-style tacos using your leftover roast pork and black beans!

This is perfect for leftover black beans, as they tend to get really thick after a night in the refrigerator.

I made a tomato salsa to put on top, recipe below, and assembled with the reheated pork from the previous post and leftover black beans. I used corn tortillas, as I think the flour ones taste like paper, and served with a blend of cheddar, Monterey Jack, and Colby cheese. Enjoy!

Salsa:

6 medium tomatoes
1 large green pepper
1 medium red onion
1 bunch cilantro
Juice of 3 limes
2 tbsp white vinegar
4 tbsp olive oil
Salt and Pepper to taste

Finely chop the tomatoes, pepper, onion and cilantro using a food processor. Place in a large bowl and add the lime juice, vinegar, olive oil. Stir to combine and season with salt and pepper to taste.

If you like a hot salsa, you can add any kind of hot pepper you prefer in addition to the green pepper.


Here Piggy!

Recipe

doublepig

Roast pork is a staple of Cuban cuisine. You’ll see it at birthdays, weddings, Christmas, and even next to the turkey at Thanksgiving. It is usually the the crown jewel of any Cuban grandma’s canon of recipes, not to be toyed with or made by anyone under the age of 50. The recipe is often shrouded in mystery and hidden away in some secret grandma hiding place or committed to memory so that no one can take it. These ladies do not mess around!

Family lore goes that my great grandmother would give you a recipe, but with one ingredient missing or changed, so that yours would not turn out exactly like hers.

Well, as the saying goes, necessity is the mother of invention. Thousands of miles away from Miami and with no Cuban grandmothers in sight, I have taken it upon myself to learn how to roast a pig.

Well, not a whole pig. That’s for a caja china, which needs to have its own post at some point.

I used a 4 lb pork shoulder and am now on day 3 of repurposing it. It only cost me about $8 and, for 3 days of dinners, not a bad deal at all!

Not My Grandmother’s Roast Pork:

1 3-4lb pork shoulder or pork butt
Juice of 1 lime
Juice of 1 lemon
Juice of 1 sour orange (or regular orange if you can’t get the sour kind)
6 cloves garlic, minced
1 tsp ground cumin
1 tbsp dried oregano
1 tsp ground coriander
1 tsp dried orange peel
1 tsp onion powder
1 tsp salt
1tsp ground black pepper
1 cup white wine
1 tsp Worchestshire sauce
2 tbsp olive oil

Combine all dried herbs, spices and garlic in small bowl.
Massage the mixture onto the pork and place into a gallon sized zip bag. Pour any remaining garlic/herb mixture into the bag.
Add the juice, wine, olive oil, and Worchestshire sauce to the bag and let out any air before sealing the bag.
Turn the bag around a few times to make sure the meat is coated with marinade and place in the refrigerator overnight, periodically turning the bag.

Preheat your oven to 450.

Once the oven comes to temperature, place the roast with the marinade poured over it in a baking dish and bake for 30 minutes. After 30 minutes, lower the heat to 300 and roast for 5 hours, uncovered.

Slice and serve with your favorite sides.


True confessions: PF Changs Edition

Recipe


changs.jpg

I. Love. PF Changs. There, I said it.

Authenticity and innovation be damned, their food is consistently good and you can find one or more in pretty much any larger city in America. My favorites there are the chicken lettuce wraps, Mongolian beef, and fried rice.

I recently came across damndelicious.net’s recipe for PF Changs-style chicken-lettuce wraps, so I thought I’d give them a shot. I am happy to report, the recipe was a hit!

Of course, I had to put my own twist on it. Here’s what I changed:
– I used four whole skinless/boneless chicken breasts instead of the ground chicken. To me, ground chicken is weird and gross. I diced the breasts into tiny cubes to mimic the original.
– I left out the sriracha, as I am just not a fan.
– Before cooking the chicken, I marinated it for a few minutes in a mixture of about a teaspoon of lemongrass paste, a few drops of fish sauce, black pepper, and garlic salt.
– I also added some fish sauce to the hoisin/soy/mirin mixture in the recipe.
– I boiled up some thin rice noodles and let them cool.  I served them along with the chicken and lettuce to add a little more heft to each wrap.

Lamb and more lamb

Recipe

lamb roast2

I love lamb. Lamb roast, lamb chops, lamb stew, lamb ragu…I could keep going for a while. I think it is a really underutilized protein for home cooks, but I’m not exactly sure why. I mean, it cooks just like beef and is often more tender than many beef cuts. And it’s not necessarily any more expensive than beef. Today I give you two levels of lamb that are sure to impress!

Basic Lamb Chops:

6 double or single cut lamb chops
3 sprigs rosemary
Olive oil
Salt and Pepper

Preheat your broiler or grill.
Let the chops sit on your counter for about 20 minutes.
If using the broiler, arrange the chops on your oiled broiler pan and lightly salt and pepper each one.
Remove the leaves (needles?) from your rosemary sprigs and place a few on the meat side of each chop.
Lightly drizzle each chop with olive oil.
Place in the oven and let them broil for about 10 minutes for medium-rare. Let them rest for about another 10 minutes and serve.

If you are grilling the chops, 5 minutes on each side on a hot grill should suffice for a nice, medium-rare chop.

As you can see, this takes little to no effort and will look really fancy when you serve them. I like to pair them with the potato gratin from a few posts ago or just a nice salad.
Be careful with the broiler. Don’t wander too far away as they will cook very quickly, especially if you are using the single cut chops. Peek through your oven window after the first 5 minute of broiling to make sure they are not burning, as they will cook through extremely fast.

Butterflied Lamb Roast:

1 3-4 lb lamb leg roast, boneless

1 teaspoon salt
1 teaspoon pepper
1 teaspoon ground coriander
1 teaspoon ground cinnamon
1 teaspoon ground turmeric
1 teaspoon dried thyme
1 teaspoon dried oregano
1/2 teaspoon garlic powder
1/2 teaspoon onion powder

3 cloves minced garlic
3 sprigs rosemary

Olive oil

Special tools: Butcher’s twine, roasting pan.

When you buy the leg roast, ask the butcher to butterfly it for you. Or, if you are feeling adventurous, you can do it yourself. Tutorial here. It’s for a pork roast, but it will work with any roast.

Preheat your oven to 375 degrees.

In a small bowl, combine the salt, pepper, and dried herbs and spices. Stir them together to combine. Set aside.

In a food processor, process the fresh garlic and rosemary with a pinch of salt, until the garlic forms a paste. The rosemary will pretty much retain its shape, so don’t worry about that.

Unroll your butterflied roast and spread the garlic and rosemary paste on the top side.

Roll the roast, with the paste inside, and tie with the twine.

Spread the dried herb and spice mixture on a large, clean cutting board and roll the tied roast through it. The mixture should stick to the meat and coat it.

Place the the roast in your roasting pan and roast in the oven for about an hour and 20 minutes. If you have a larger roast, calculate about 2o minutes per pound for medium rare.

Let the roast rest for 15 minutes before carving and serving.


CROQUETA, CROQUETA, CROQUETA!

Recipe

croqueta

I love croquetas. Ham, cod, cheese, chicken, and yes, even kale! You can put almost anything in bechamel, bread it and fry it into those wonderful little cylinders of deliciousness. I mean, Pepe Billete even wrote a song about them and whatever the filling, irregardless, they’re delicious!

Now, as much as we Cubans want to claim them as our own, the croqueta or croquette is not a Cuban invention. Older versions can be found across Spain, France, Portugal, Italy and other countries that have been around longer.

Personally, I have always been intimidated by the thought of making them. I had visions of explosions in oil and runny bechamel. The first few times I made them, it was supervised by the watchful eye of my far more talented partner in sandwich-making. More on that later. But now, living so far away from a Carreta or Versailles, I’ve finally found the courage to attempt them on my own. And, surprisingly, they were a success!!!

I used the Three Guys From Miami recipe and it worked beautifully. The only things I did differently were to use white wine instead of sherry and I didn’t have any nutmeg, so I left it out. I also only had half a pound of ham, and it still worked out just fine. If you do attempt this though, be sure your bechamel is THICK. Like the consistency of mashed potatoes thick. It also helps to make the filling one day ahead and refrigerate it overnight.

Buen Provecho!

A tale of two gratins

Recipe


gratin

Merriam-Webster defines a gratin as a dish that has bread crumbs or cheese on top and is baked in an oven. While that is, technically, true, a gratin is a much more complex dish than all that. If you google the word gratin, you’ll find myriad interpretations of the dish. You’ll also find the traditional potato, cheese, cream version too. Oh and those godawful boxed ones you find in the rice aisle at the supermarket.

Today, I present to you two variations. One, a more classic potato-leek adapted from an Ina Garten recipe I had found years ago and the other a Southern French zucchini gratin which I was introduced to by one of my favorite French ladies. I hope I can do her gratin aux courgettes justice!

Potato-Leek-Fennel Gratin:
photo on right, above

6 medium-small potatoes, sliced thin
1 large leek, sliced with the top discarded
1 large fennel bulb, cored, sliced and with the fronds discarded
1 cup grated parmesan cheese
1 cup grated gruyere cheese
1 cup grated emmental cheese
2 cups heavy cream
butter or cooking spray for greasing the pan
1 tbsp fresh thyme
1 tsp nutmeg
Salt and Pepper

Preheat the oven to 375 degrees. Grease an 8×8 or 9×13 glass baking dish. Set aside.

In a large skillet, heat about a tablespoon of butter and saute the leeks and fennel until tender, about 10 minutes. Season with salt and pepper. Set aside.

Combine all three cheeses in a bowl, then sprinkle the bottom of the baking dish with some of the cheese mixture.

Begin to arrange a single layer of the potato slices on top of the cheese. Once you have enough to cover the bottom of the pan, spoon and spread some of the leek and fennel mixture on top. Sprinkle a pinch of the nutmeg and thyme on top of that. Very sparingly add salt and black pepper.  Then, sprinkle more of the cheese mixture on top of that. Make another layer of potato slices and repeat the process above until you are just slightly over 3/4 of the height of the baking dish. Make sure that your top layer is just potato slices. Then, sprinkle any remaining cheese over the top.

Pour the heavy cream over the mixture and let it absorb before placing in the oven for about 45 minutes. You’ll know it’s done when the top is a deep, golden brown. Let it rest for about 10 minutes before serving as it will be extremely hot.

Gratin aux Courgettes:
photo on left, above

3-4 small zucchini, grated
1 medium onion, chopped
8oz diced ham
1 cup cooked white rice
1 cup plain breadcrumbs
1/2 grated parmesan cheese
1 cup milk
1 egg
2 tbsp butter
Salt and Pepper

Preheat the oven to 375 degrees. Grease either an 8×8 or 9×13 baking dish with 1tbsp of the butter. Coat the bottom and sides of the pan with about 1/2 cup of the breadcrumbs and set aside.
In a large saucepan, heat the remaining tbsp of butter and add the onion and grated zucchini. Saute for about 10 minutes or until the onion is translucent and the zucchini is tender. Stir in the ham, season with salt and pepper and let it cook for another minute or so. Remove from heat.

In a large bowl, combine the rice with the zucchini, ham, and onion mixture. Stir in the parmesan. In a smaller bowl or measuring cup, beat the egg into the milk. Gradually add the milk and egg mixture to the other ingredients. Be sure to do this very slowly as the mixture will be hot and you don’t want to cook the egg in it.

Once you have combined all the above ingredients, pour the mixture into the baking pan. Don’t worry if you have some left over. Top the mixture in the pan with the remaining breadcrumbs and bake for 45 minutes to 1 hour, until the top is a deep, golden brown.

Just like the other gratin, let it rest for about 10 minutes before serving.


Chef Duty at Chez Mes Parents: Fideua

Recipe

fideua


After six months over here in the upper left hand corner, I decided it was about time for a visit home. I have to say, a week was clearly not enough time to catch up with all the friends, family, and food that I wanted to, but there were plenty of memorable meals and outings to tide me over until my next visit!

Upon my arrival, my dining public had a list of demands. By dining public, I mean my parents and my aunts. They are a small but enthusiastic and vociferous bunch!

First up, Fideua.

Fideua is a variation on a Spanish seafood paella in which you switch out the rice for noodles. The story goes that somebody was hosting a paella party somewhere in Spain in the 1960s and ran out of rice. They ran to their pantry and found fideos, the noodle nests used in many Spanish and Cuban soups. They crushed up the noodles, dropped them in the pan and fideua was born .

I actually prefer this preparation to the traditional paella. It’s lighter and requires less effort than the original, so it’s nice to make for a crowd at home. I also have an aversion to any paella not made by someone I know who is good at making it, but I think that’s just because I’m spoiled by knowing so many good home cooks.

Anyway, here it is. Recipe from Penelope Casas’ The Food and Wines of Spain. If you love Spanish food, you MUST get this book. See notes for my additions and adaptations.

3/4 lb halibut steak cut in 1.5 inch cubes
Coarse salt
1/2 cup olive oil
1/2 lb small shrimp, shelled
1/4 lb large shrimp, unshelled
2 cloves minced garlic
1 tsp paprika
1/8 tsp cayenne pepper
2 medium tomatoes skinned and chopped
6 cups fish broth
Few strands saffron
3/4 pound noodle nests
12 small clams
12 small mussels

Sprinkle the halibut with salt and let it sit for 10 minutes. Heat the oil in a metal paella pan and saute all the shrimp until they just turn pink. Reserve the shrimp. Add the halibut cubes to the pan and saute lightly for a minute or so and add the garlic, paprika, cayenne, and tomato. Add the fish stock and saffron and bring to a boil. Add the noodle nests, breaking each one into 3 parts. Season with salt and cook, uncovered and stirring occasionally for 3 minutes. Add the clams and mussels and continue cooking until the noodles are no longer soupy, but some liquid remains. Stir in the reserved small shrimp and arrange the unshelled shrimp on top. Transfer to a 350 degree oven and bake for 10 minutes. Turn up the heat to 450 degrees and bake for another 5 minutes or until the liquid is absorbed and the noodles are crusty around the edges.

Notes:

If you can’t find the noodle nests, you can break up some spaghetti or vermicelli noodles.
If they are in season, I like to add some small scallops and a lobster tail or two. 

You don’t absolutely need to use halibut if you can’t find it. Just make sure you use a fresh, white-fleshed fish.  I’ve made this with grouper, dolphin, yellowtail, and fresh cod and it has always turned out well. 
I like to add some chopped Italian parsley and lemon slices on top before I put it in the oven. It looks pretty and the lemon adds a nice acidity to the dish.
You can also add some diced Spanish chorizo when you saute the shrimp. Only use one or two small chorizos, as any more will overpower the taste of the seafood. 

You can get The Foods and Wines of Spain here.